
Making Your Bathroom Safe and Wheelchair Accessible | Living Spinal
Posted by Living Spinal on Mar 2nd 2026
Making Your Bathroom Safe and Wheelchair Accessible
The bathroom is often the most challenging room to navigate for people with limited mobility, but it is also one of the most critical for independence and dignity. Transforming a standard bathroom into a wheelchair-accessible space isn't just a home improvement project; it's a vital modification for safety and freedom.
This guide will walk you through the key areas to consider and introduce innovative solutions available at Living Spinal that can help bridge the gap.
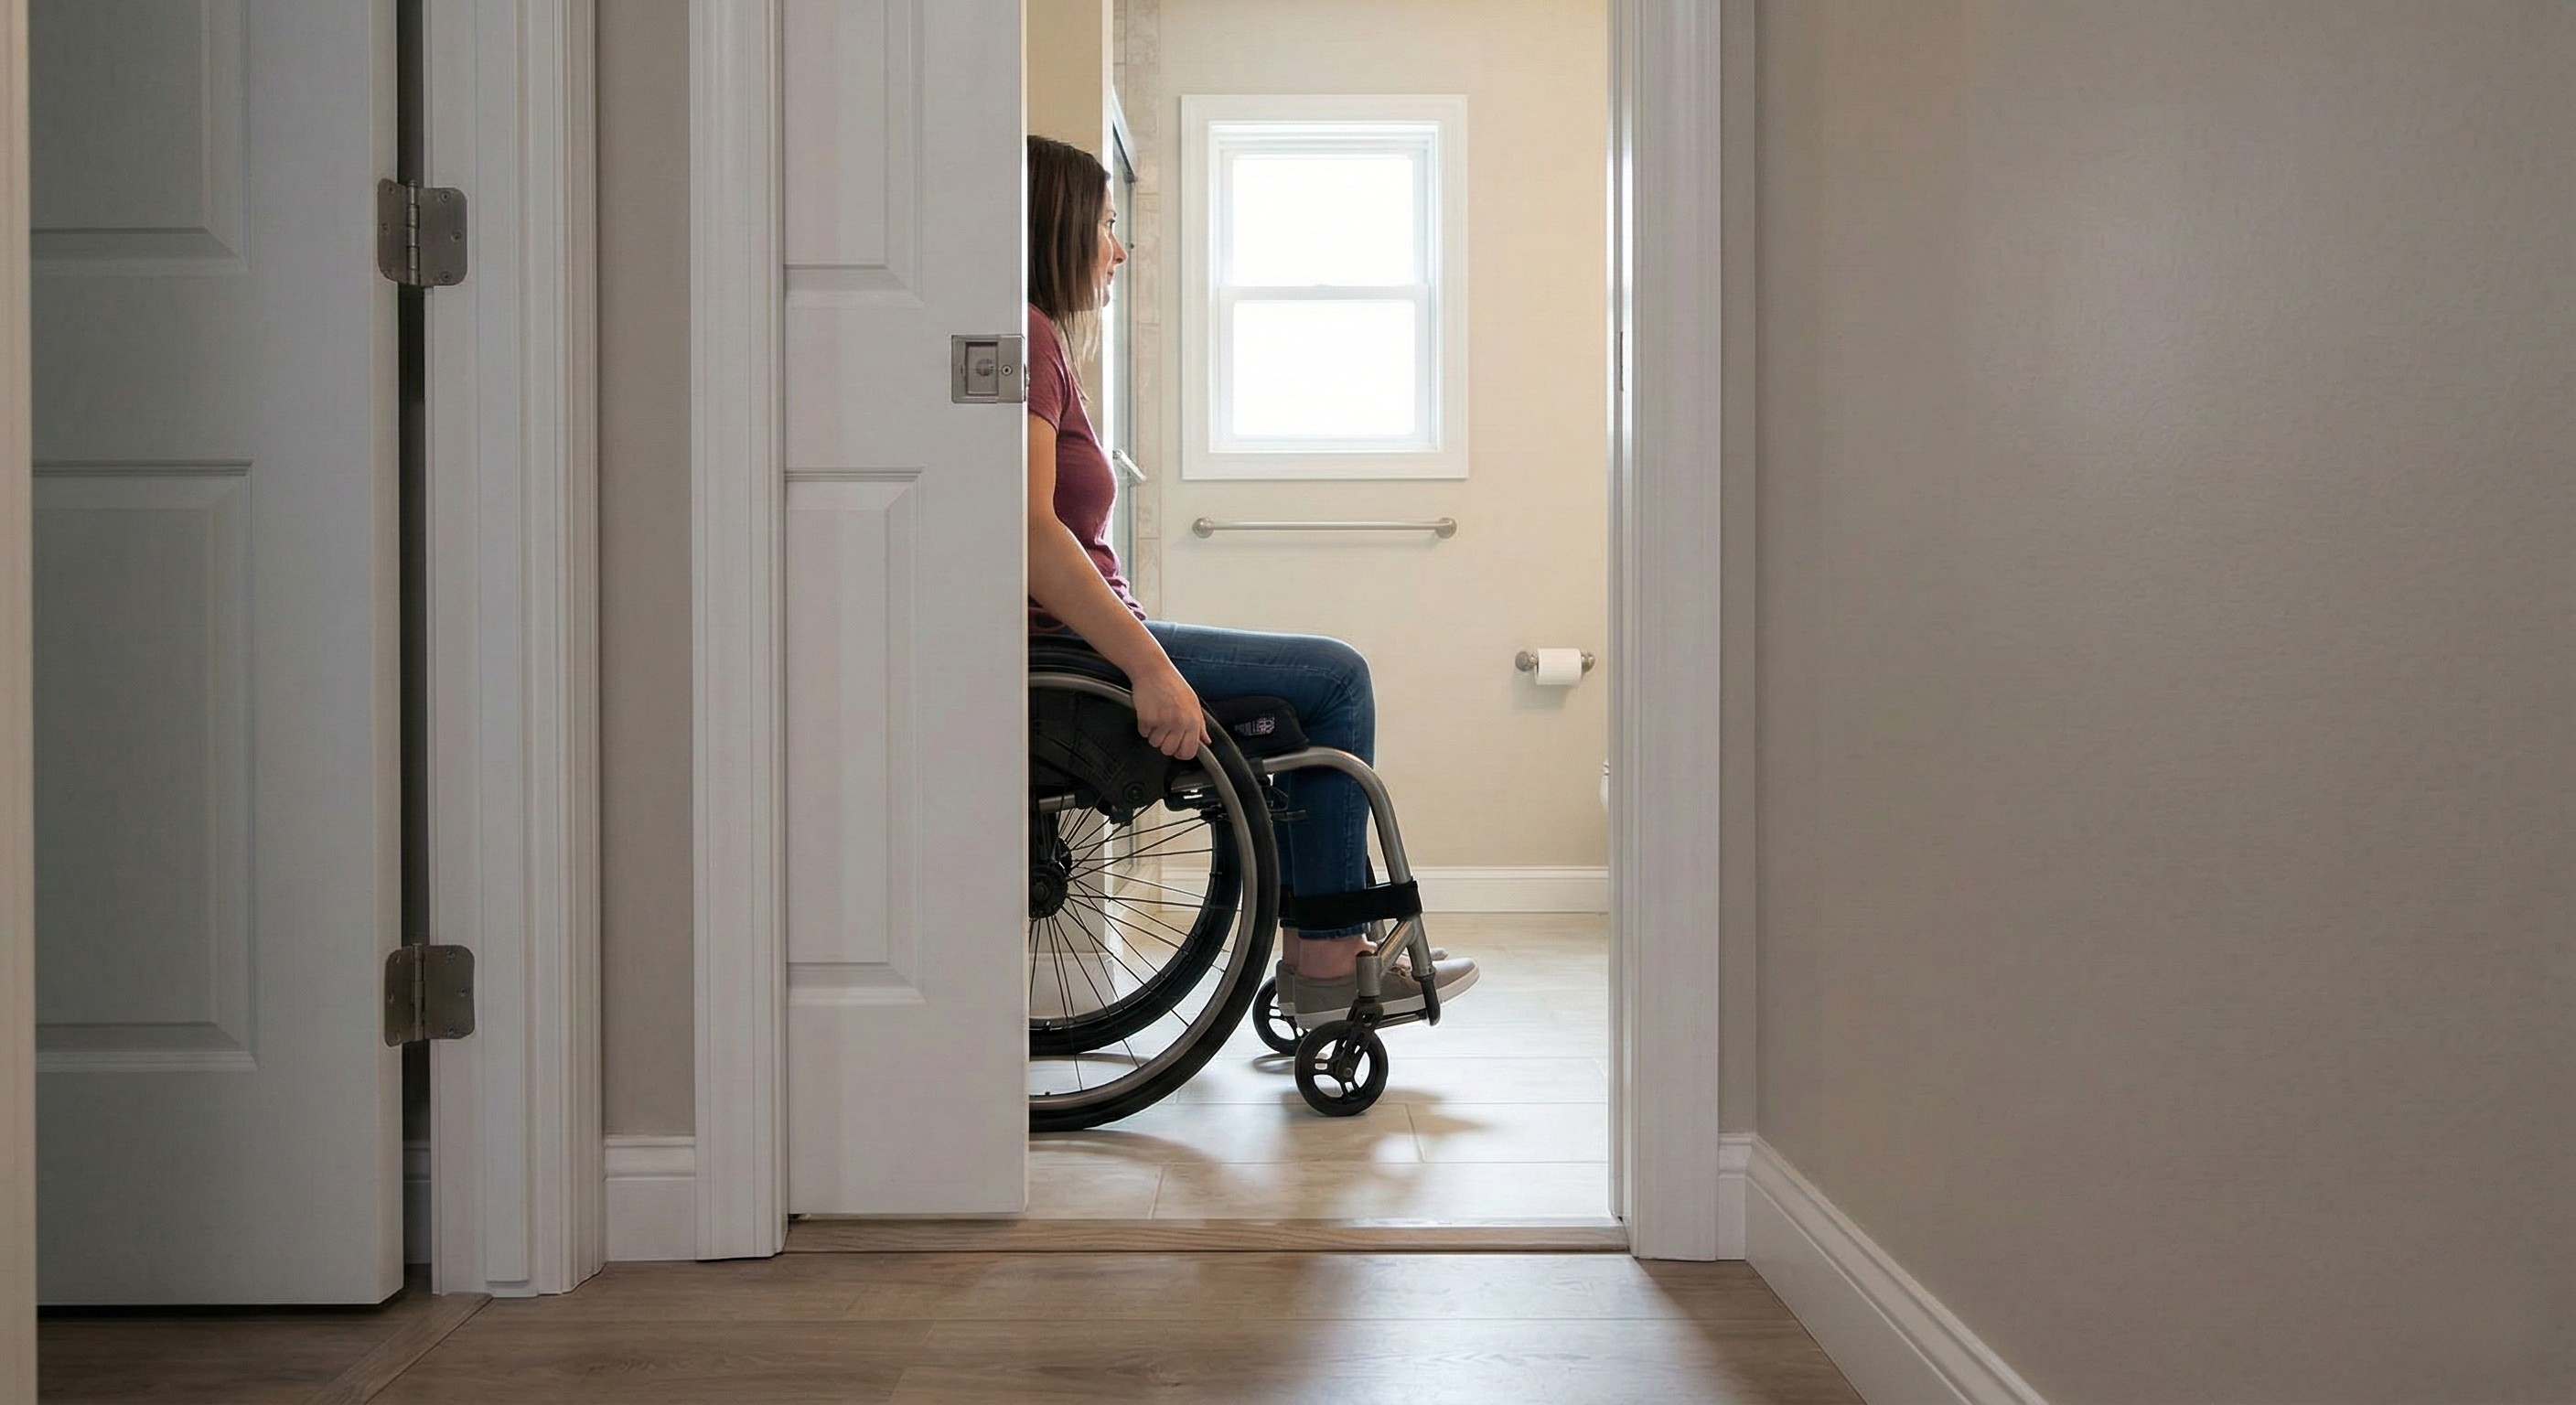
1. Clear the Way: Opening the Entry
A standard bathroom door is usually around 28–30 inches wide, which is too narrow for most wheelchairs. Expanding the doorway is the crucial first step.
-
Door Width: Aim for a 32-to-36-inch clear opening. This often means widening the rough opening and installing a larger door.
-
Threshold: Eliminate high thresholds. Replace them with low-profile, beveled, or zero-step transitions to prevent tripping and allow smooth wheel access.
-
Swing: In a tight space, consider a pocket door or a door that swings outward rather than inward to create more maneuvering space inside.

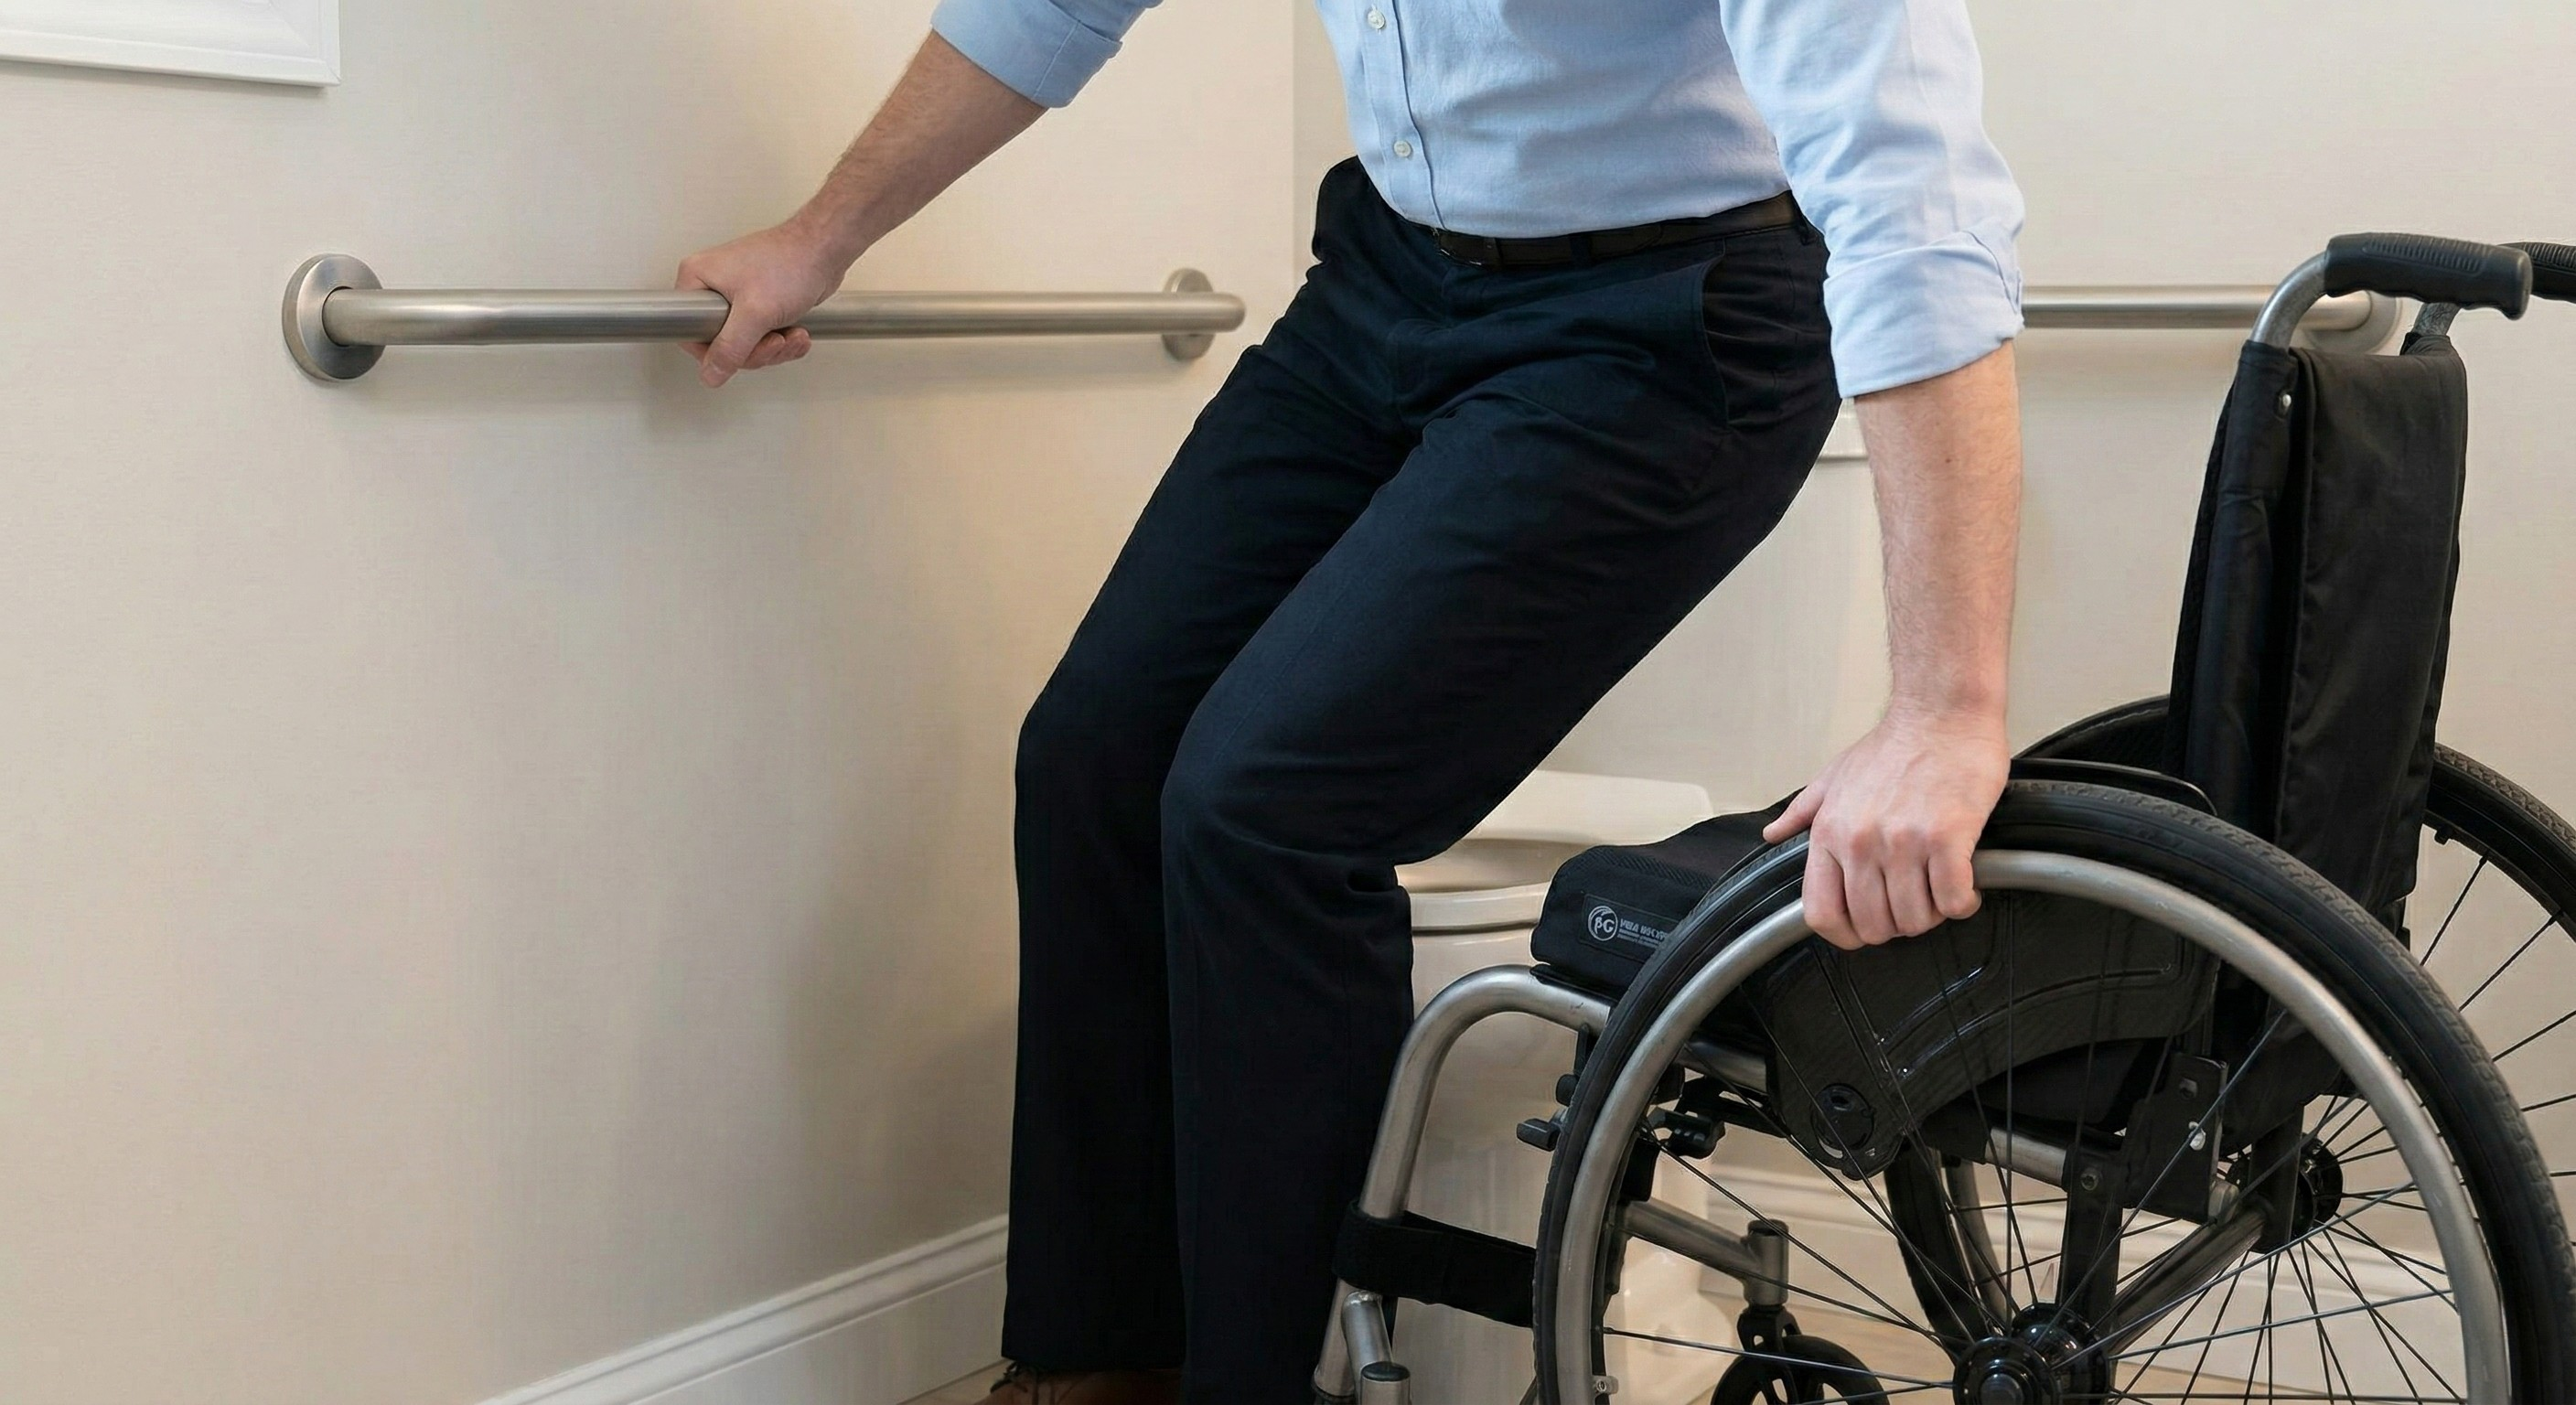
2. The Toilet Zone: Stability and Height
Standard toilets can be difficult to transfer to and from safely.
-
Height Matters: Install an "ADA compliant" or comfort-height toilet, which is 17 to 19 inches high (compared to the standard 15 inches). This aligns better with most wheelchair seat heights, making transfers easier.
-
Grab Bars: This is non-negotiable. Sturdy, securely mounted grab bars (at least 1.5 inches in diameter and supporting 250 lbs) should be installed on both the back wall and the sidewall nearest the toilet.
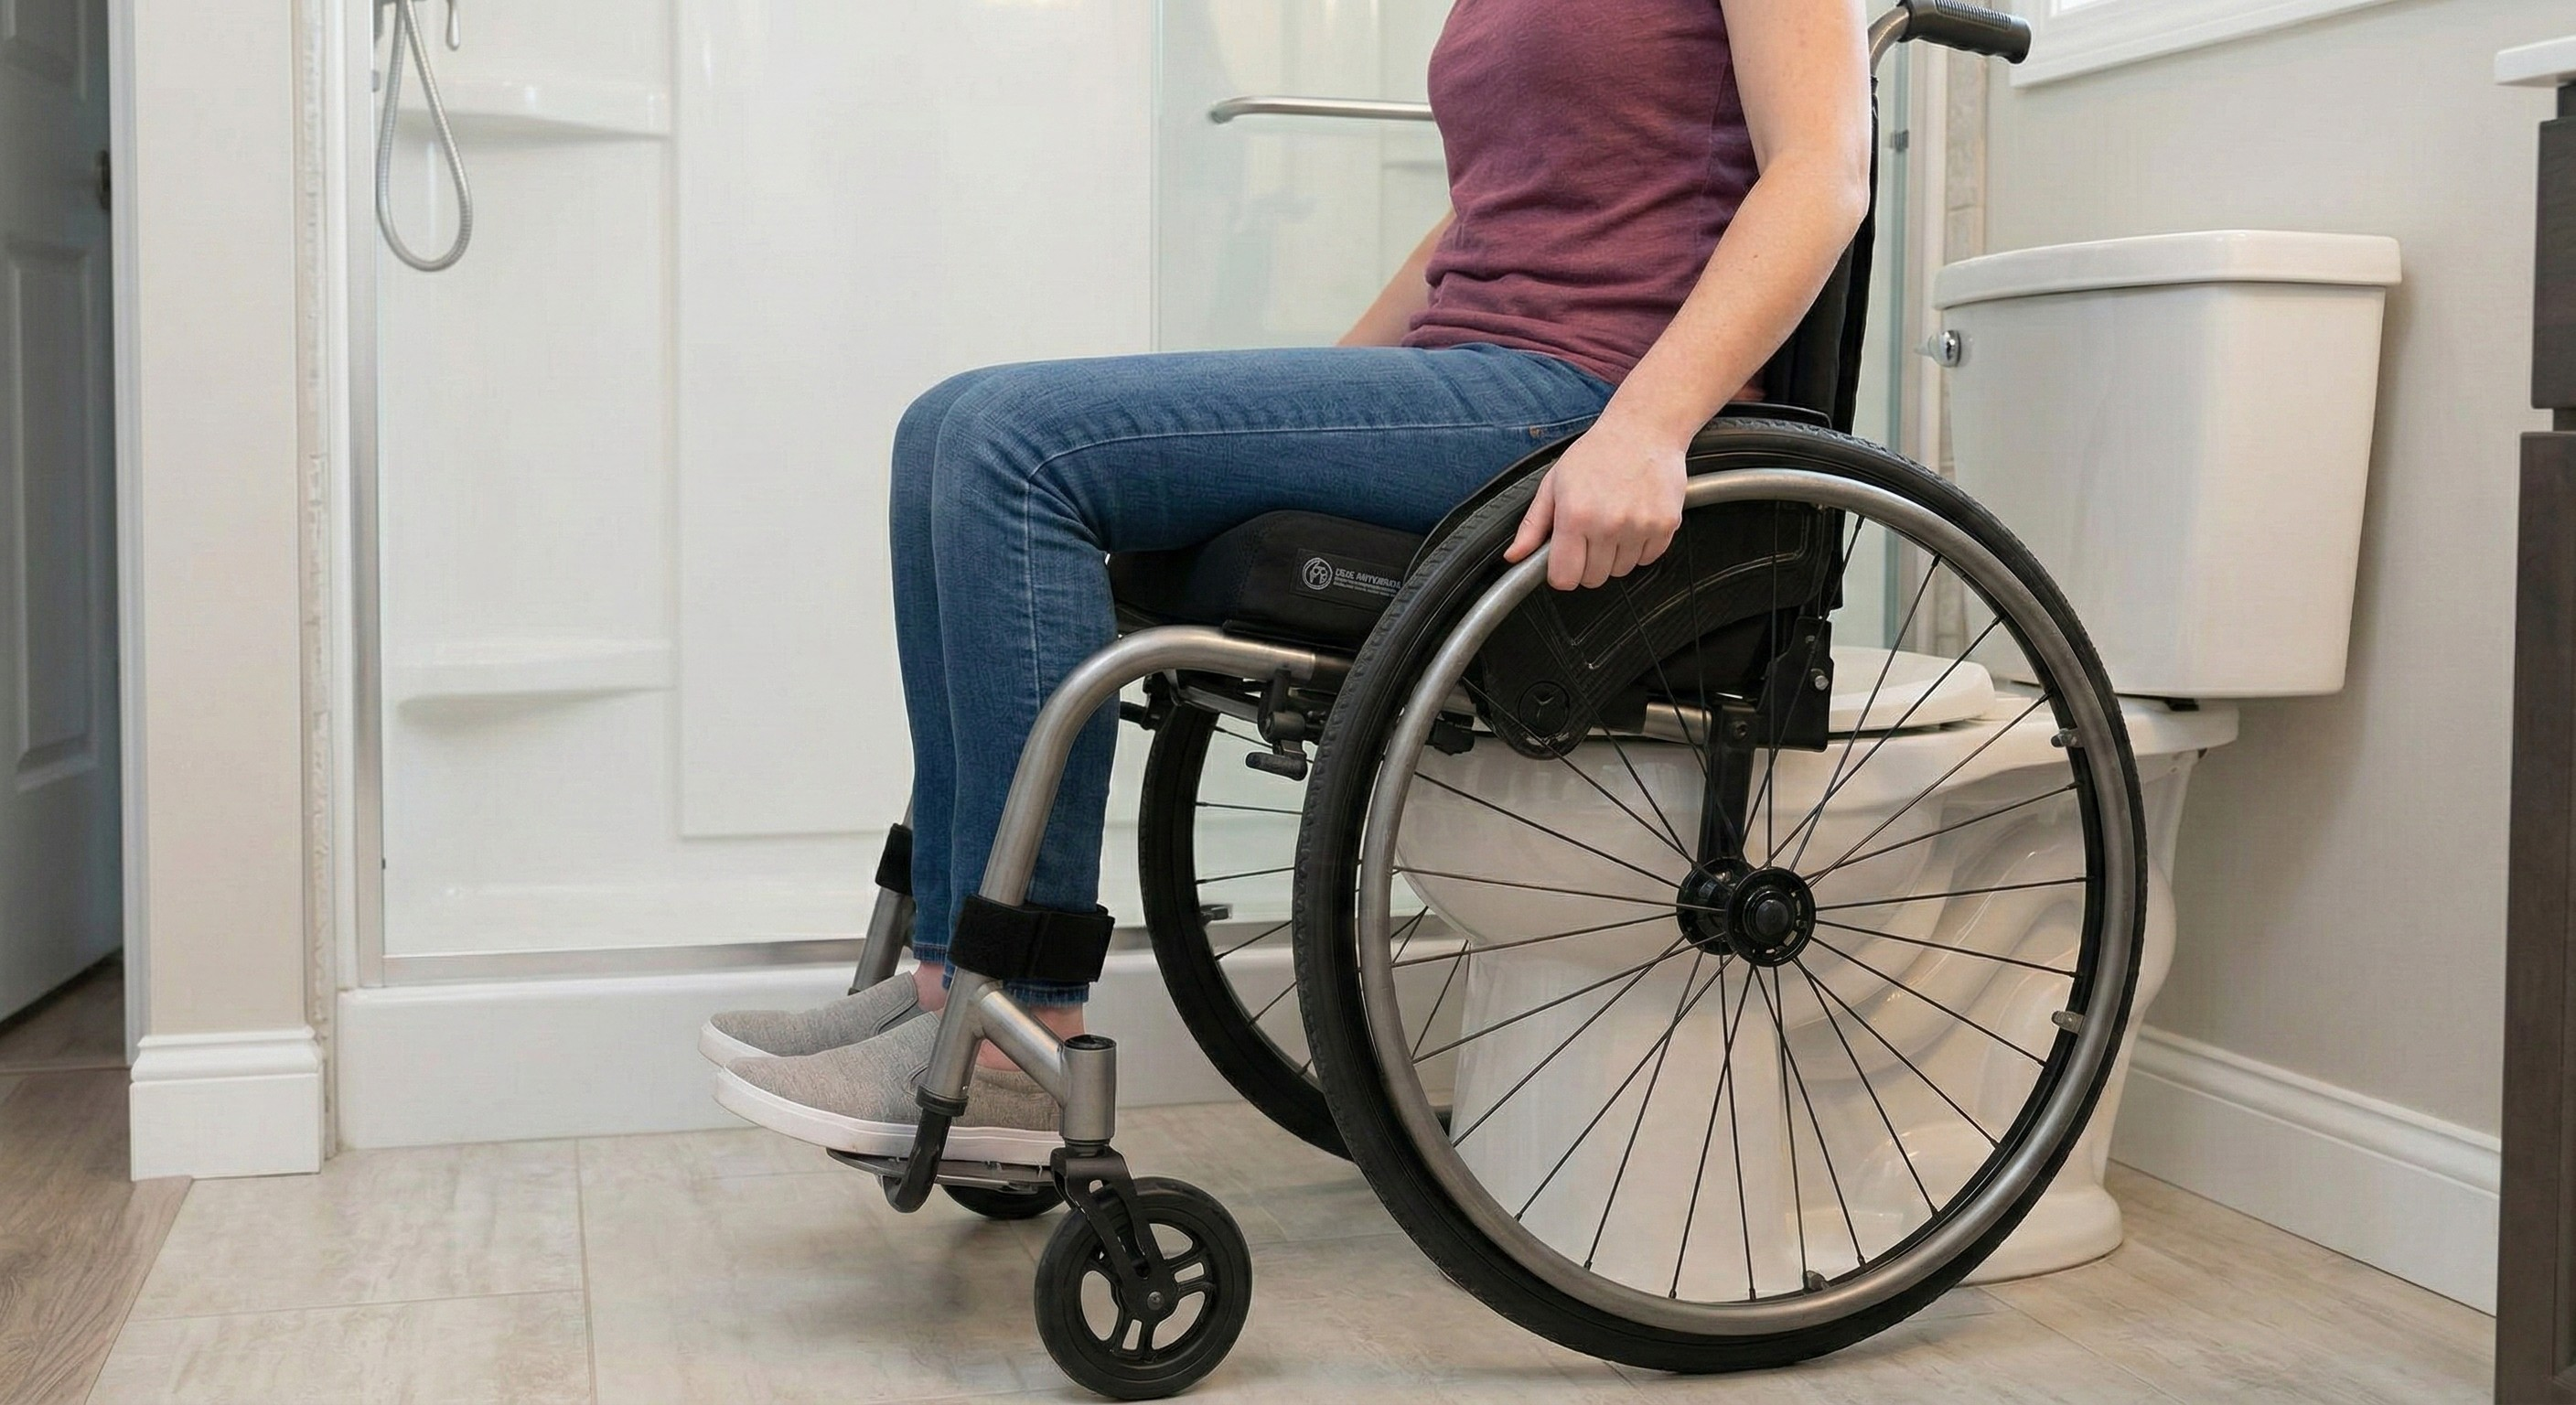
Solution Spotlight: Self-Propelled Independence
A unique solution for comprehensive access is a specialized chair designed to manage both toileting and bathing needs seamlessly. The
3. Shower and Tub Solutions: Safety Over Water
Traditional bathtubs present a massive barrier. Removing the tub in favor of an accessible shower is a primary goal.
-
Roll-In Showers: The ideal setup is a curb-less, zero-entry shower where the wheelchair can roll directly inside.
-
Fold-Down Benches: Install a secure, wall-mounted bench that folds up when not in use.
-
Handheld Sprayers: A handheld showerhead on a slide bar is essential for control while seated.
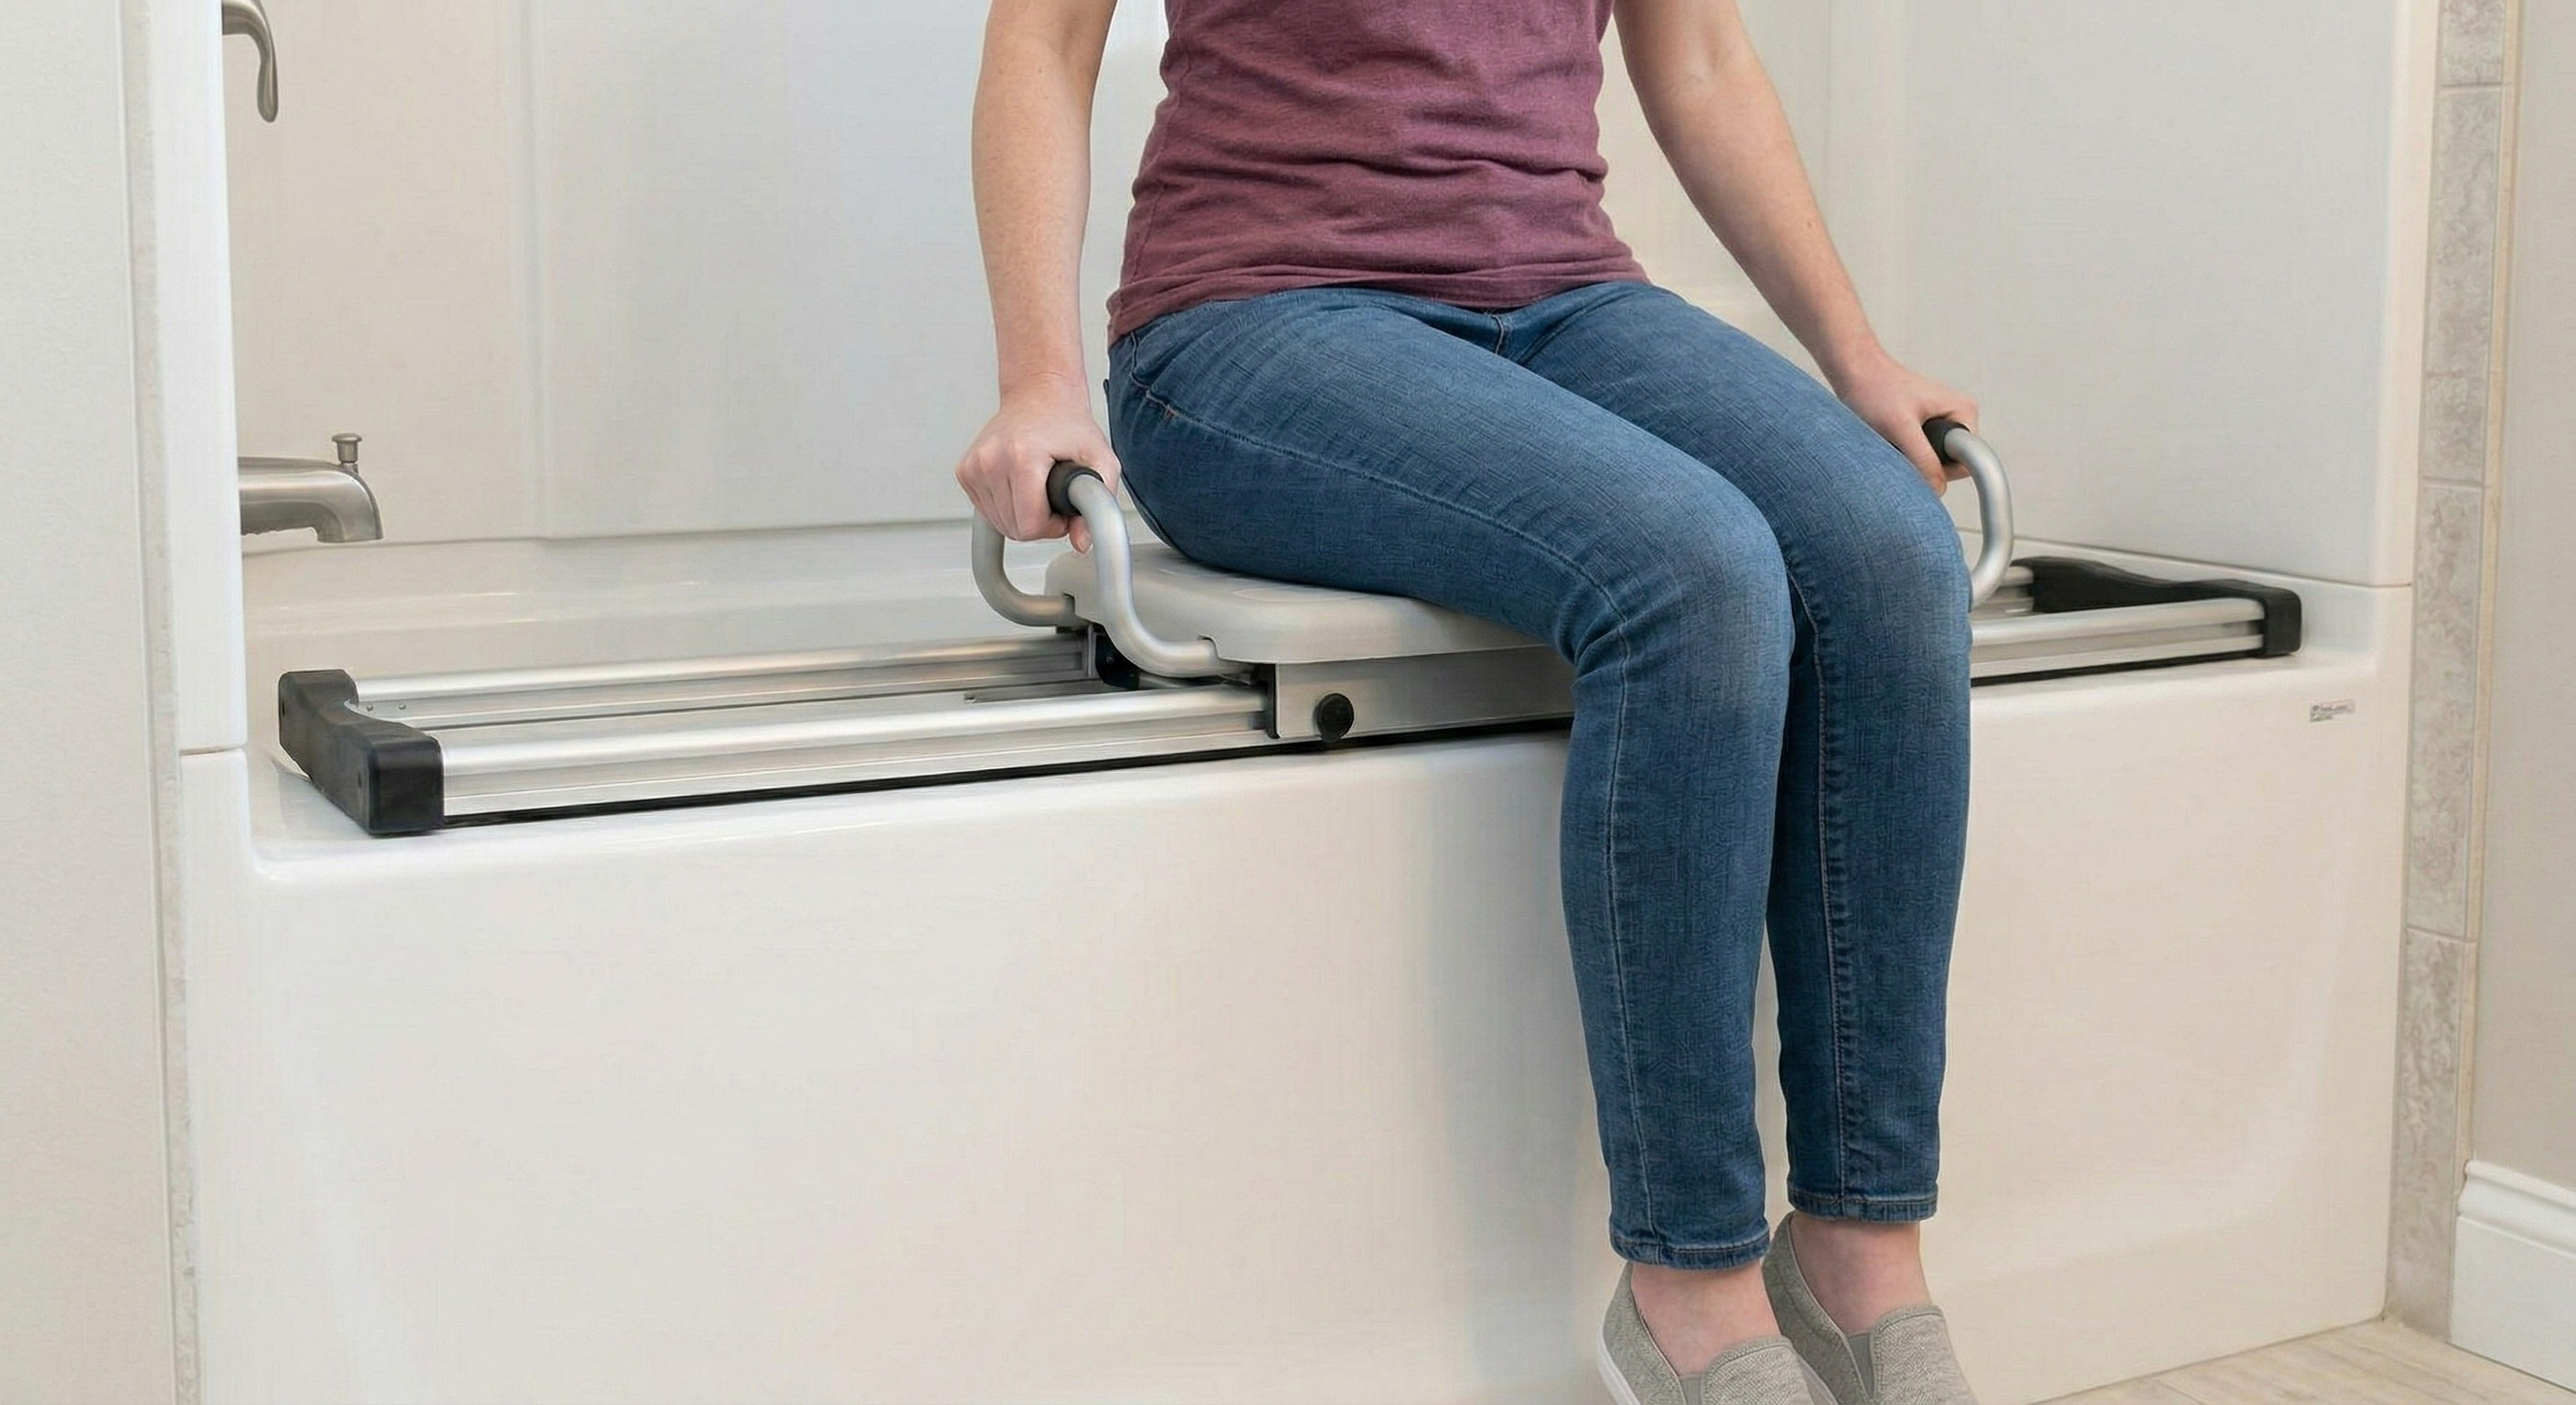
Solution Spotlight: The Sliding Transfer Bench
For those who cannot do a structural roll-in renovation, innovative devices can bridge the gap. The
Additional Reading: Comprehensive Access Catalog
For a wider selection of assistive devices, including different types of transfer aids, lifts, and specialty seating, browse the full
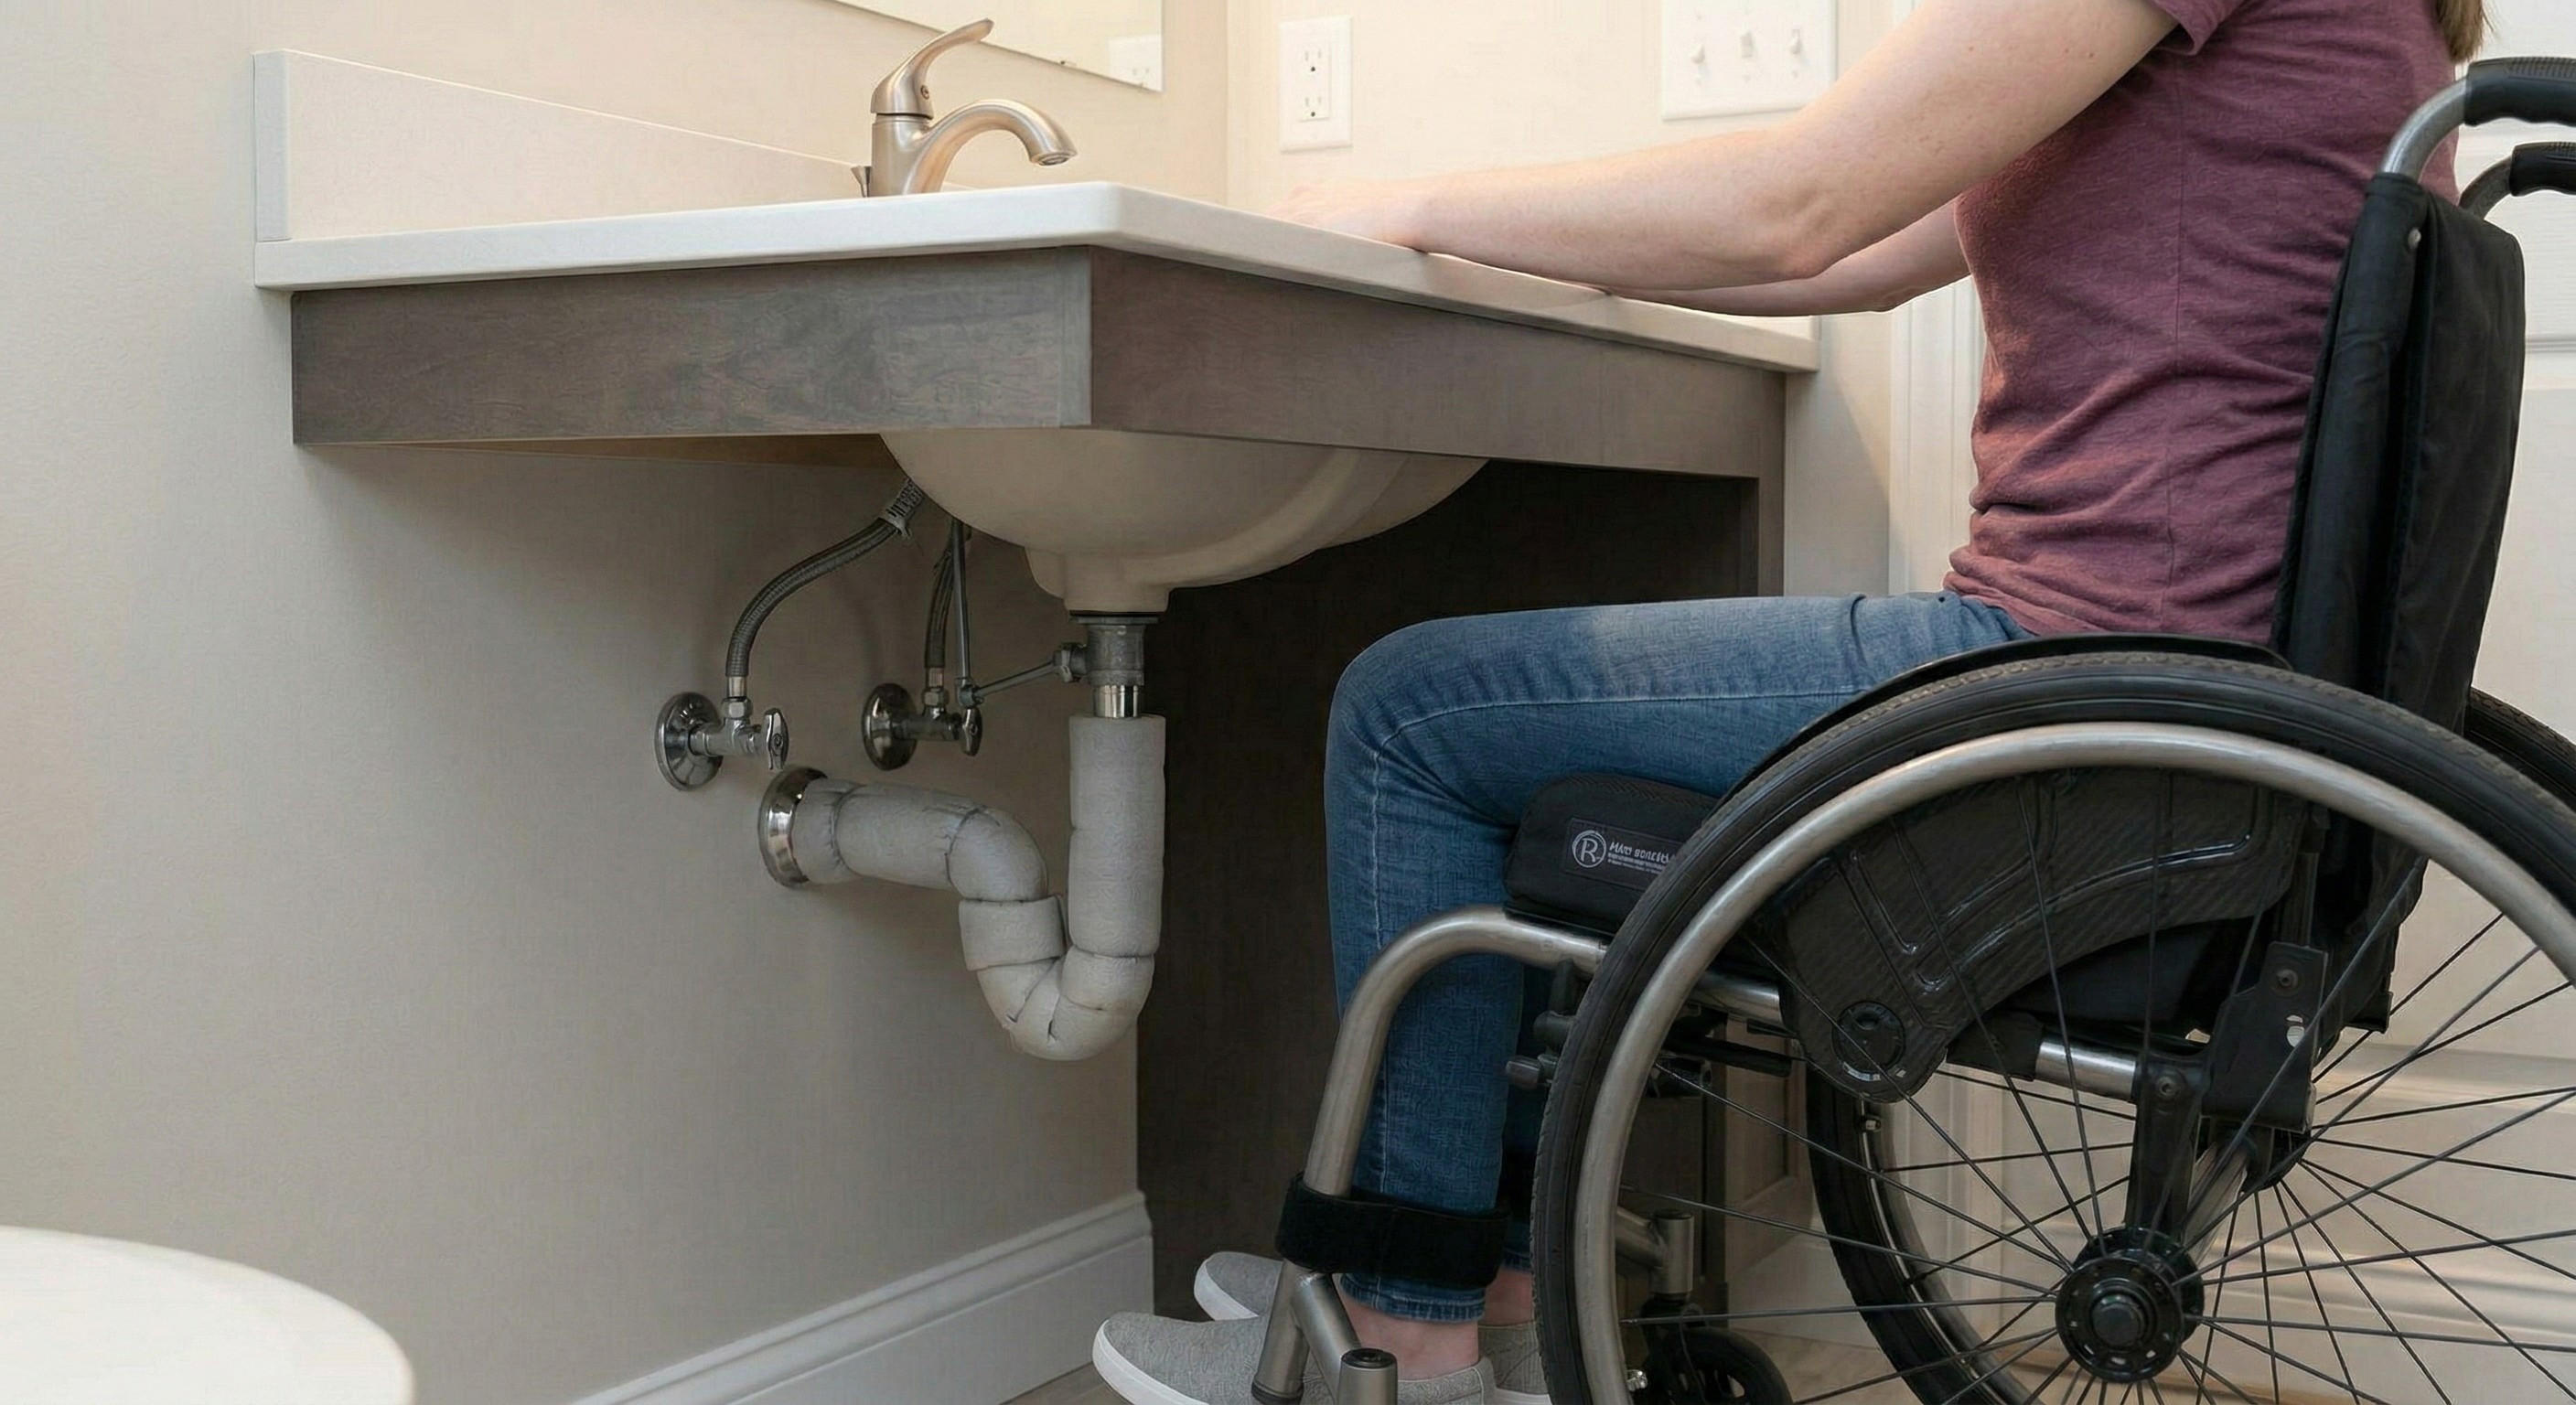
4. Roll-Under Vanities and Sinks
A accessible bathroom vanity must allow the user to roll their wheelchair underneath for proper access.
-
Knee Clearance: Design the sink counter with at least 27 inches of knee clearance and remove cabinets from below the sink basin.
-
Wrapped Pipes: Critical safety point: Exposed hot water pipes under the sink must be wrapped or insulated to prevent leg burns for users with reduced sensation.
-
Faucet Access: Standard faucets are too deep. Install single-handle or motion-activated faucets near the front of the counter. Lever handles are much easier to use than twisting knobs.
Conclusion: Investing in Independence
An accessible bathroom modification is a deep investment in long-term safety and personal independence. While structural renovations offer the most seamless results, devices like the ShowerGlyde and specialized commode chairs provide immediate, flexible solutions where major remodeling is difficult.
By planning carefully and focusing on stable transfer points, knee clearance, and reliable assistive technology, you can create a bathroom space that is not only accessible but truly empowering.